
The Geothermal Installation Process: What to Expect From Start to Finish
So, you've done your homework, crunched the numbers, and decided that geothermal heating and cooling is the way to go for your home. Now, you might be wondering about one of the most anxiety-inducing questions for many homeowners: What’s the actual installation process like? How long's it gonna take? How disruptive will it be? What do you need to do to get ready?
The good news is, while geothermal installation is a bit more complex than just swapping out a conventional HVAC system, it’s a tried-and-true process that skilled contractors handle regularly. In this thorough guide, we’ll take you through every step of a typical geothermal installation — from that first phone call to the final system commissioning — so you’ll know exactly what to expect at each stage along the way.
Phase 1: Initial Consultation and Site Assessment (Week 1-2)
The installation process kicks off way before any equipment shows up or any digging takes place. This initial consultation and site assessment phase is super important for crafting a system that fits your home's needs and works well with your property's conditions.
The Initial Phone Call or Meeting
Your first chat with a geothermal contractor usually starts with discussing your home, your current heating and cooling setup, any comfort concerns you might have, and what you're hoping to achieve. The contractor will ask about things like your home's size, age, insulation levels, current HVAC gear, energy bills, and any specific comfort issues. This initial conversation helps the contractor figure out if geothermal's a good fit for you and sets the stage for the site visit.
The Site Visit
A qualified contractor will always check out your property before giving you a final proposal. During the site visit, they'll look into several key factors:
- Property assessment: They'll measure the available outdoor space for loop installation, check the soil conditions, and take note of obstacles like trees, utilities, septic systems, and structures that could impact loop placement.
- Home evaluation: They’ll inspect your home's insulation, windows, ductwork, electrical panel, and mechanical room to get a grasp on the home's heating and cooling loads and see if any changes are necessary.
- Existing HVAC inspection: They’ll evaluate your current equipment, ductwork sizing, and thermostat setup to figure out what can be reused and what might need tweaking.
- Underground utility locating: They’ll identify where buried utility lines, septic systems, and other underground infrastructure are located to plan safe paths for drilling or trenching.
Load Calculation and System Design
After the site visit, the contractor will carry out a Manual J load calculation to figure out exactly how much heating and cooling your home needs. This calculation takes into account everything that impacts your home's thermal performance — from the insulation in your walls to how much solar heat your windows let in, and even how air moves in and out.
Using the load calculation and what they observe on-site, the contractor will put together a complete system design. This includes the right size and model for the heat pump, the type and layout of the ground loop, any ductwork changes that might be necessary, the thermostat and control system, a desuperheater for hot water (if that's part of the plan), and the electrical requirements.
The Proposal
You’ll get a detailed written proposal that lays out the full scope of work, equipment specs, installation timeline, warranty details, and total cost. The proposal should break down the costs by component (like equipment, loop installation, indoor work, electrical, and permits) so you can see exactly where your money’s going. Most contractors will also share info on available tax credits and financing options.
Phase 2: Pre-Installation Preparation (Week 2-4)
After you’ve signed the contract, there are a few important steps to take care of before installation day rolls around.
Permitting
Your contractor takes care of the permitting process, which might involve getting building permits for HVAC installation, well drilling permits for vertical loops, environmental permits for open loop systems, and excavation permits. The time it takes to get permits can vary depending on where you live — some places can issue them in just a few days, while others might take 2-4 weeks. Your contractor should be familiar with the local timeline and should factor that into the schedule.
Equipment Ordering
This is when heat pump equipment and loop materials are ordered. Most equipment should arrive in about 1-2 weeks, although some specialized items might take a bit longer. Your contractor should verify lead times during the proposal stage.
Site Preparation
Depending on the type of loop you’re getting, you might need to prepare your property for installation:
- For horizontal loops: Make sure to mark and clear the trenching area of any garden features, temporary structures, or movable landscaping elements you want to keep safe.
- For vertical loops: Ensure the drilling area is accessible for the drilling rig (which is usually truck-mounted and needs a path about 10 feet wide).
- For all installations: Clear out the indoor mechanical room where the heat pump will go, and make sure the contractor can access the electrical panel.
Utility Line Marking
Before any digging starts, underground utilities need to be professionally marked. Your contractor will set up utility locating services (often through the state's 811 "Call Before You Dig" program) to pinpoint the exact spots of gas lines, water mains, sewer lines, electrical conduits, and telecommunications cables.
Phase 3: Ground Loop Installation (Days 1-3)
Ground loop installation is often the most noticeable and disruptive part of the project, but the good news is that it usually goes pretty quickly. The time it takes depends on the type of loop being installed.
Horizontal Loop Installation (1-2 Days)
For horizontal installations, a backhoe or trencher digs the necessary trenches to the right depth and length. The loop piping is then laid out in the trenches according to the specified design (like straight runs or slinky configurations), and the pipe connections are made using thermal fusion welding. Once everything's in place and all connections are leak-tested under pressure, the trenches are backfilled with the soil that was dug up. Be prepared for some significant yard disruption during this phase, but rest assured, the area will be restored after backfilling.
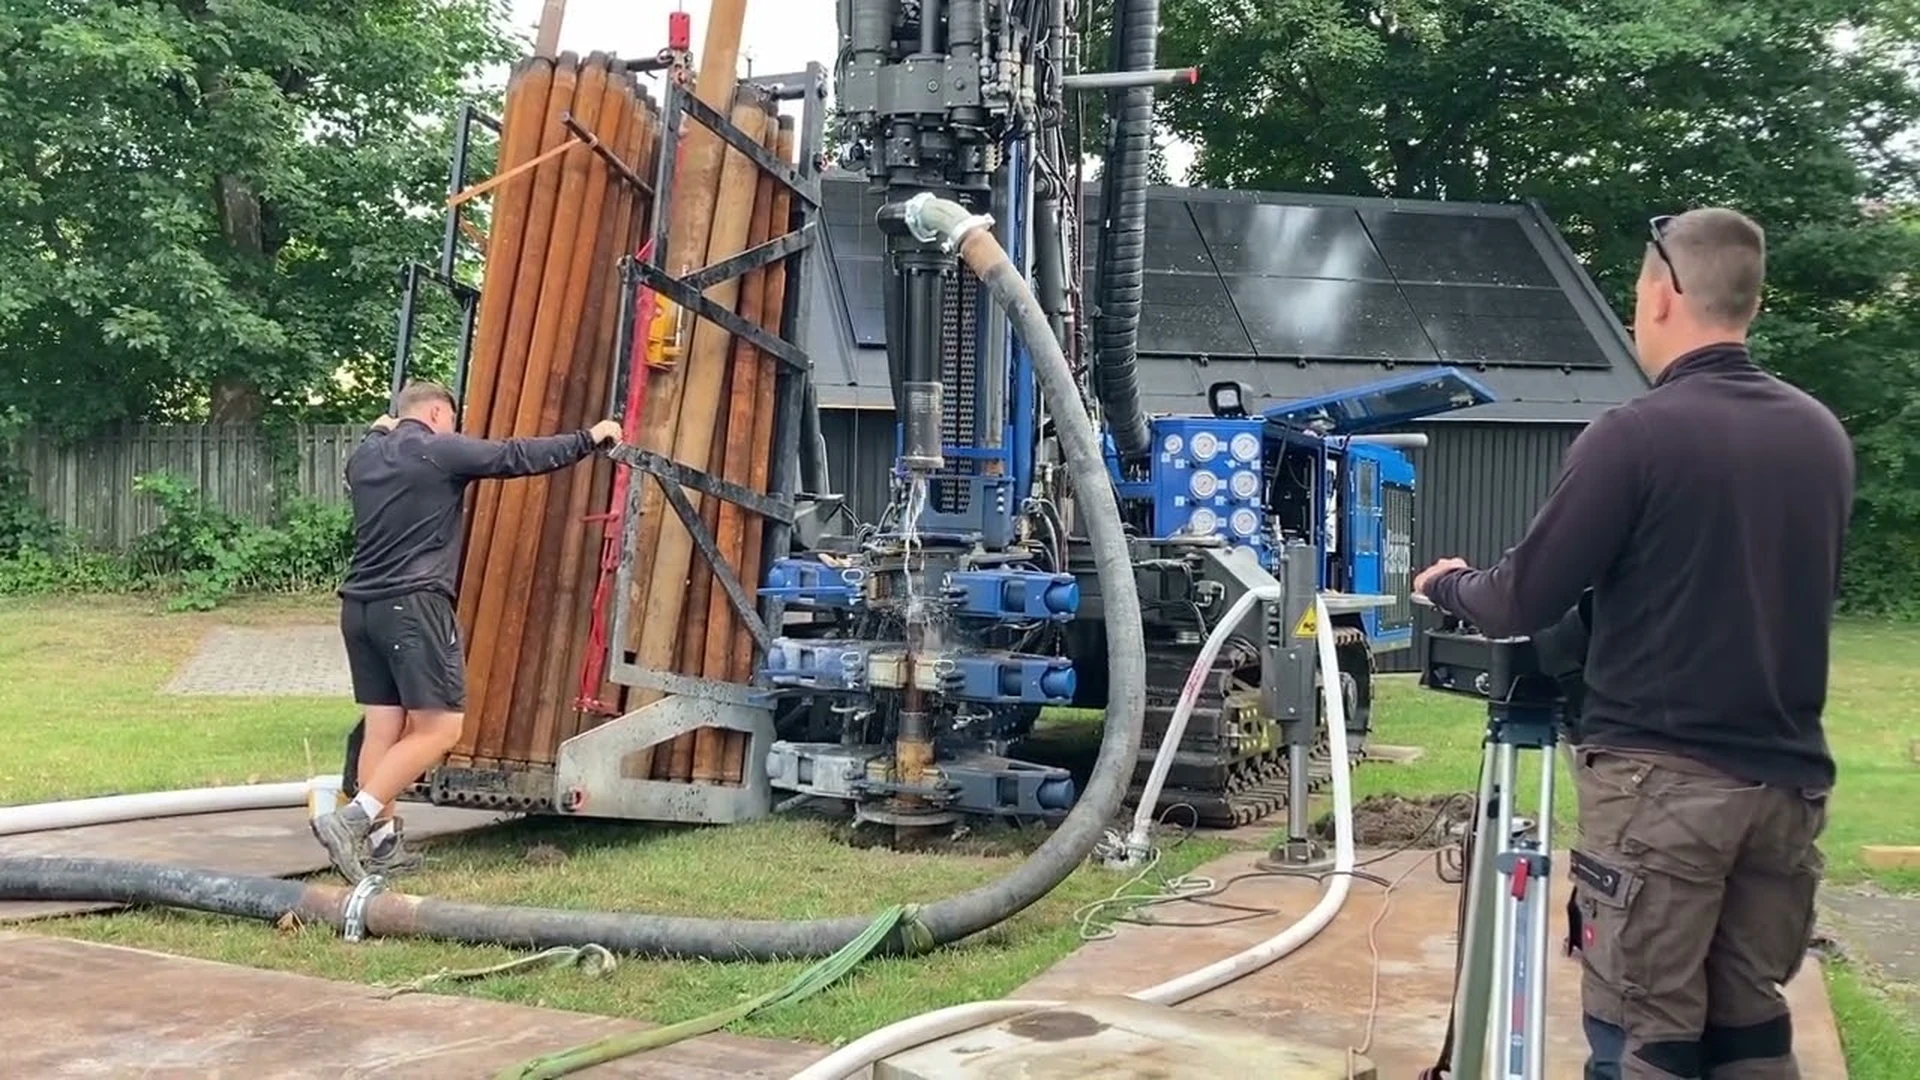
Vertical Loop Installation (1-3 Days)
Vertical installation kicks off with the drilling rig being set up at each borehole location. Drilling each borehole usually takes 4-8 hours, depending on the depth and the geological conditions. After drilling, U-shaped pipe assemblies are inserted into each hole, and thermally enhanced grout is pumped in to fill the space between the pipes and the borehole wall. The drilling rig is mounted on a truck and needs stable ground access — your contractor will plan the rig’s path to keep landscape impact to a minimum.
Pond/Lake Loop Installation (1 Day)
Pond or lake loops are the quickest to install. Coils of pipe are put together on the shore, floated out to the right spot on the water, weighted down, and sunk to the bottom. The supply and return pipes are then trenched from the water's edge back to the house.
Loop Pressurization and Testing
No matter what kind of loop you’re working with, the finished ground loop gets filled with a water-antifreeze mix and is pressure tested before any backfilling or burial takes place. This test checks that all connections are tight and that the loop can maintain pressure without any leaks. Usually, this involves pressurizing the loop to over 100 PSI for about 15 to 30 minutes and keeping an eye out for any pressure drops. Only after it passes this test can we move forward with the installation.
Phase 4: Indoor Installation (Days 2-4)
Even though the outdoor loop work might've caught your eye, the indoor installation is just as crucial and usually takes place at the same time or right after the loop installation wraps up.
Old Equipment Removal
Your current furnace, air conditioner, and any related equipment are carefully disconnected and taken out. If you've got a gas furnace, the gas line to that unit is properly capped and tested to ensure safety. Depending on your agreement with the contractor, the old equipment will either be hauled away or left for you to dispose of.
Heat Pump Installation
The geothermal heat pump unit gets set up in your mechanical room, usually on a vibration-dampening pad. It’s connected to the ground loop piping, your home’s ductwork (or radiant system), the condensate drain, and the electrical supply. If you’re including a desuperheater, it’ll be hooked up to your water heater as well.
Ductwork Modifications
Most geothermal installations need some tweaks to the ductwork. Since geothermal heat pumps typically deliver air at a slightly lower temperature but higher volume compared to gas furnaces, you might need larger duct runs, extra return air pathways, or adjusted supply registers in certain areas. A skilled contractor will assess your existing ductwork during the design phase and factor in any necessary changes in the project scope.
Electrical Work
A licensed electrician, usually part of the installation crew, takes care of all the electrical connections. Geothermal heat pumps generally need a dedicated 30-60 amp circuit from your electrical panel, depending on the size of the unit. If your current capacity isn’t enough, your panel might need a subpanel or circuit breaker upgrade.
Thermostat Installation
Your new thermostat's all set up and connected to the geothermal system. It’s a good idea to use a thermostat that's specifically designed for or compatible with geothermal heat pumps. Standard thermostats might not handle all the geothermal operating modes, like auxiliary/emergency heat lockout and desuperheater control.
Phase 5: System Commissioning and Startup (Day 4-5)
Commissioning is the final step and it’s super important! This is when we test, calibrate, and verify that everything's working properly with the installed system.
System Flush and Purge
We flush the ground loop at high flow rates to get rid of any air bubbles or debris. Proper purging is key — if air gets trapped in the loop, it can cause noise, lower flow, and mess with heat transfer. We also check the circulating pump’s performance to make sure there’s enough flow throughout the entire loop circuit.
Refrigerant Charge Verification
We check the heat pump's refrigerant charge following the manufacturer’s guidelines. Getting the refrigerant charge right is crucial for efficiency and the lifespan of the equipment — having too little or too much can cut performance by 10-20% and speed up compressor wear.
Performance Testing
The contractor will run the system in both heating and cooling modes, measuring the entering and leaving water temperatures on the loop side, as well as supply and return air temperatures on the duct side, system pressures, refrigerant temperatures, airflow through the ductwork, and electrical consumption. We compare these measurements to the manufacturer’s specs to make sure the system is performing as it should.
Thermostat Programming
We’ll program the thermostat with your preferred temperature settings, schedules, and operating parameters. The contractor will walk you through how to use the thermostat effectively with your geothermal system, including any differences from a conventional thermostat (like minimizing setback temperatures to prevent the auxiliary heat from kicking in).
Homeowner Training
A solid contractor’s gonna take the time to walk you through your new system. This training usually includes how to operate the system and use the thermostat, where to find and when to change the air filter, what to expect during normal operation (like sounds, temperatures, and run times), how to spot potential issues, emergency shutdown steps, and all the warranty details along with service contact info.
Phase 6: Property Restoration and Cleanup (Week Following Installation)
In this last phase, we’ll get your property back to how it was before the installation:
- Yard restoration: We’ll grade, seed, or sod any trenched or drilled areas as outlined in your contract. Just keep in mind that full landscape restoration might take a growing season to finish.
- Indoor cleanup: We’ll tidy up the installation area, remove any old equipment, and put back any temporary changes we made.
- Final inspection: Many places require a final building inspection to ensure everything’s up to code. Your contractor usually takes care of this.
Installation Timeline Summary
Here’s what you can generally expect for a full residential geothermal installation:
- Consultation and design: 1-2 weeks
- Permitting and equipment ordering: 1-4 weeks
- Ground loop installation: 1-3 days
- Indoor installation: 2-3 days
- Commissioning: 1 day
- Total from contract signing to operating system: 4-8 weeks
On-site installation usually takes just 3-5 working days. The longer timeline mainly comes from permitting, equipment lead times, and scheduling.
How to Prepare for Your Installation
To make sure your installation goes off without a hitch, here are some handy preparation tips:
- Clear the mechanical room: Take out any storage items around your existing HVAC equipment to give the installers some room to work.
- Mark valued landscaping: Use flags to mark any garden features, plants, or yard elements near the loop installation area that you want to protect.
- Arrange alternate climate control: You might be without heating or cooling for 1-2 days during the switch. Plan ahead with space heaters or fans.
- Inform your neighbors: Drilling rigs and excavation equipment can be pretty noisy. A quick heads-up to your neighbors goes a long way.
- Confirm access: Make sure the installation crew can get to your yard, mechanical room, and electrical panel throughout the project.
- Ask questions: Don’t hesitate to reach out to your contractor about anything you’re unsure about. Good communication can help avoid issues.
What Happens After Installation
After your system is up and running, you can expect an adjustment period of a few weeks while you get used to how the geothermal system works. You might notice some differences, like longer, gentler run cycles compared to your old gas furnace; the supply air will feel warm but not hot (usually around 90-100°F instead of 130-140°F with a gas furnace); you'll enjoy more even temperatures throughout your home; it’ll be significantly quieter; and you’ll likely see a big drop in your energy bills during the first full billing cycle.
Your contractor should check in within the first month to review the system's performance and answer any questions or concerns you might have. It’s also a good idea to schedule annual maintenance visits to keep everything running smoothly.
Conclusion: A Smooth Process with the Right Contractor
Geothermal installation does take a bit more work than just swapping out your usual HVAC system, but with a skilled contractor, it can be a well-organized, predictable process that many homeowners find way less disruptive than they expected. The secret to a successful installation lies in picking a qualified, experienced contractor who communicates well and manages the project like a pro from start to finish.
Ready to get started? Check out our directory of certified geothermal contractors to find experienced installers near you who'll help you every step of the way.
Looking for a Geothermal Contractor?
Browse our directory of verified geothermal professionals.
Find Contractors